In an organization with multiple Active Directory forests, you may want to sync objects from trusted forests. Adding trusted forests to Azure AD Sync is a simple process that I will likely cover in a future article. The focus of this post is the not-so-obvious process of removing a forest from Azure AD Connect. This can be a daunting and somewhat scary thing to do. Not fully understanding the process or having someone to guide you can leave you with thoughts like “what happens when I remove the forest from Azure AD Sync? Do on-premises objects get deleted? Are cloud objects deleted?”. I will try to answer these questions to the best of my ability and hopefully make the process simple and stress-free for you.
To get started, we first need to open PowerShell and disable the AD Sync scheduler. You can do this by running the “Set-ADSyncScheduler” cmdlet:
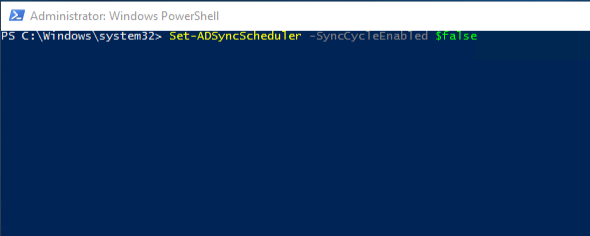
This cmdlet is included in the ADSync PowerShell module. You may need to load the module prior to using the cmdlet:
Import-Module ADSync
The next step is to open FIM (miisclient) located in the install directory of Microsoft Azure AD Sync. By default, this is C:Program FilesMicrosoft Azure AD SyncUIShellmiisclient.exe. Once you have FIM open, click on the Connectors tab, then right click on the connector for the forest that you want to delete, and click “Delete”.
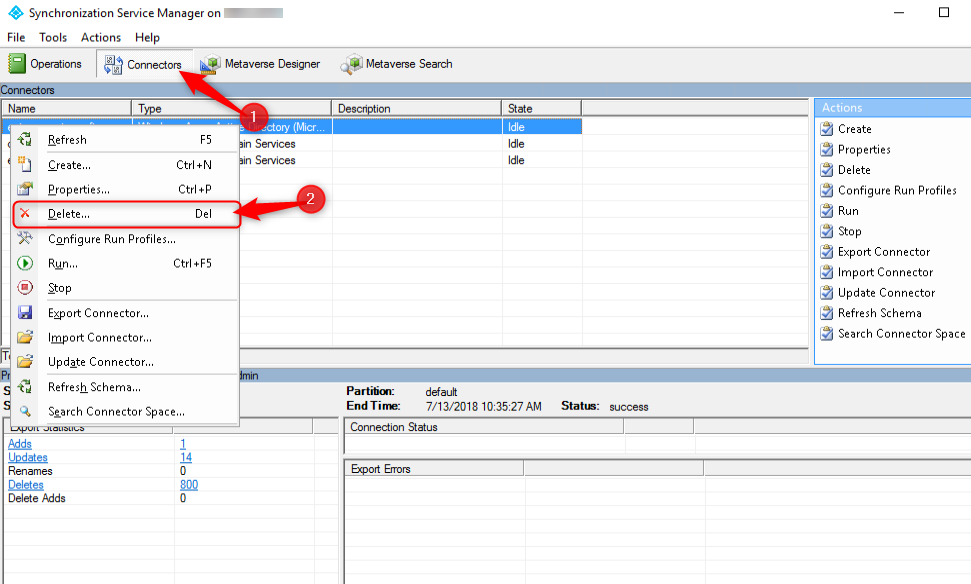
You will then be prompted, asking if you want to just delete the Connector Space, or delete the Connector and the Connector Space. The former open removes all data, but keeps the configuration in case you want to use it again later. The latter option deleted the data and the configuration. This open should only be used if you don’t plan on syncing the forest again.

The connector for the forest is now deleted, but what actually happens? Your on-premises objects do not get removed for the forest, and cloud objects are removed. Simple enough, right?
Now you just need to re-enable the AD Sync Scheduler with this cmdlet:
Set-ADSyncScheduler -SyncCycleEnabled $true
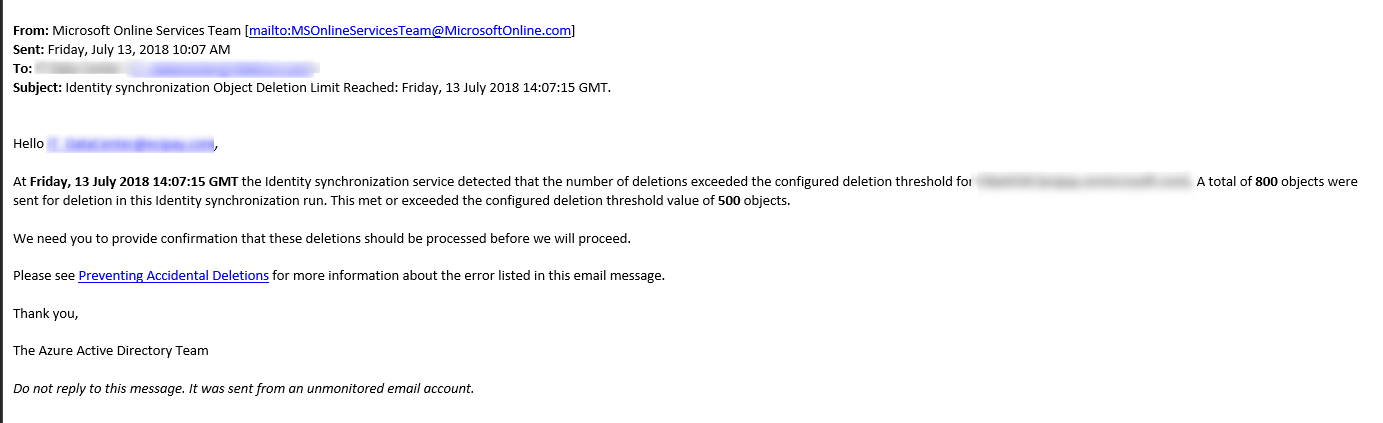
One last thing to mention… You may receive an email from the Microsoft Online Services Team stating that the identity synchronization failed due to a deletion threshold being met. By default, Azure AD Connect will not allow you to delete more than 500 objects in your cloud directory. This is to protect you from making a careless (potentially resume generating) mistake. The email will look something like this:
If you are certain that you want to proceed with deleting the objects, here are the steps:
Disable the deletion threshold protection. Open PowerShell on your Azure AD Sync server and type in this cmdlet: Disable-ADSyncExportDeletionThreshold. You will be prompted for credentials, sign-in with an Azure AD Global Admin account.
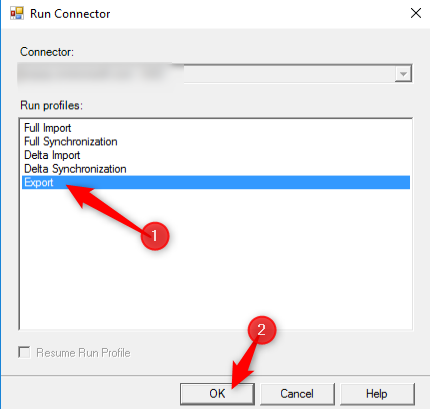
Open FIM (miisclient), and click on the “Connectors” button at the top of the window. Right click on the connector of type “Windows Azure Active Directory”, and select “Run…”.
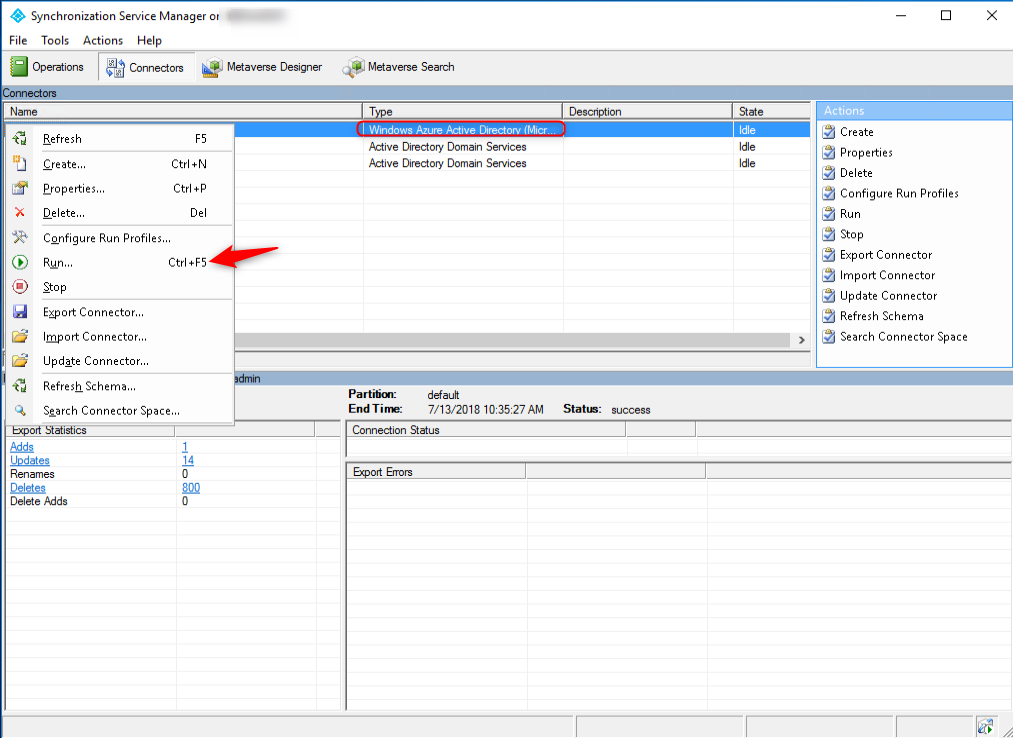
- Next, click Export and then click Ok.
Allow the connector to run. This will take a few minutes. You can monitor the progress by clicking the Operations button.
Once this completes, you need to re-enable the deletion threshold. You can do this by running this cmdlet:
Enable-ADSyncExportDeletionThreshold -DeletionThreshold 500.
You will be prompted for credentials again. Just type in your Azure AD Global Admin creds. You can even lower the threshold if you’d like. I set mine to 100.